[Explained] How to Reduce 5V to 4V Using Resistor?
While there exists an array of sophisticated methods for voltage regulation, including buck and boost converters, low-dropout regulators, and switched-mode power supplies, the age-old technique of utilizing resistive dividers remains relevant, especially in non-critical applications.
This article delves into the intricacies of deploying resistors to attenuate a 5V potential down to an approximate 4V level. Harnessing the principles encapsulated in Ohm’s Law and Kirchhoff’s circuit laws, this discourse seeks to elucidate the methodology to achieve such a voltage drop.
Geared towards engineers, hobbyists, and enthusiasts who seek a rudimentary yet effective voltage adaptation solution, this exposition promises a clear and technically informed walkthrough.

Components and Tools for Reducing 5V to 4V Using a Resistor
Here is the list of Components and Tools for Reducing 5V to 4V Using a Resistor:
- Resistor: Select one based on calculations using Ohm’s Law.
- Load: Identify the device needing 4V.
- Multimeter: Measure output voltage accurately.
- Calculator: Perform necessary resistance calculations.
- Resistor Tolerance: Consider its percentage tolerance.
- Resistor Datasheet: Check specifications.
- Power Dissipation Calculation: Ensure safety.
- Soldering Equipment (if needed): Secure connections as necessary.
Step-by-step Guide: From 5V to 4V using Resistors
Achieving a voltage drop from 5V to 4V using resistors is a practice rooted in understanding electronic principles. Here’s a detailed step-by-step guide:
1. Determine the Load Current Iload
Before you embark on voltage reduction, ascertain the current drawn by the load at 4V. This current, termed Iload, is essential for calculating the necessary resistor.
2. Application of Ohm’s Law
Ohm’s Law, expressed as V = I × R, forms the backbone of this process. Given that we desire a voltage drop of 1V over the resistor, and we know the Iload, the resistor value Rrequired can be determined using:

Where Vdrop is 1V (i.e., 5V – 4V)
3. Selecting the Resistor
Using the calculated resistance value from step 2, select a resistor close to Rrequired from commercially available values. Always consider the tolerance of the resistor (like ±5% or ±1%), as this could affect the accuracy of the desired voltage drop.
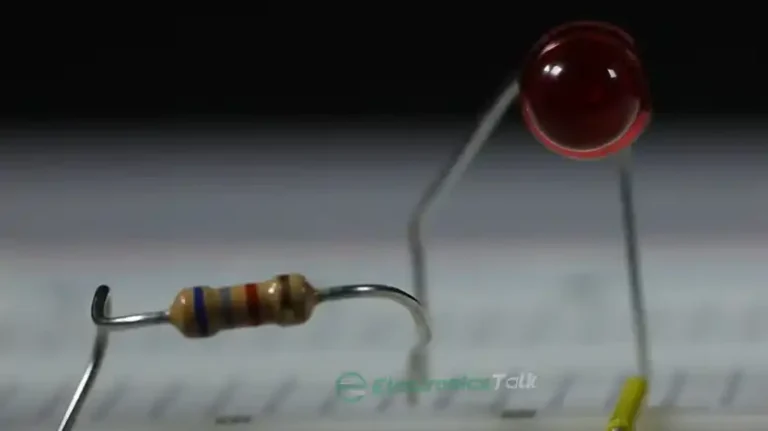
4. Connect the Resistor in Series
To introduce the voltage drop, integrate the resistor in series with the load. This ensures that the same current Iload flows through both the resistor and the load, inducing the desired voltage drop across the resistor per Kirchhoff’s Voltage Law (KVL).
5. Power Dissipation Check
Resistors dissipate energy in the form of heat. Using the formula P = I2 × R, ensure that the resistor’s power rating exceeds the calculated power dissipation. For safety and longevity, a common practice is to choose a resistor with at least twice the calculated power rating.
6. Verification
Once set up, use a precise multimeter to measure the voltage across the load. Ensure it’s close to 4V, taking into account resistor tolerance and potential variations in Iload.
7. Adjustments (if necessary)
If the measured voltage isn’t sufficiently close to 4V, adjustments might be needed. This could involve selecting a resistor with a slightly different resistance or fine-tuning other circuit parameters.
In essence, employing resistors to achieve voltage drops combines the practical application of Ohm’s Law and Kirchhoff’s laws. When executed correctly, this method provides a technically robust, efficient, and cost-effective solution for voltage control in electronic circuits.
Example of Reducing 5V to 4V using a Resistor
Suppose a device requires 4V and draws a current of 0.1A Iload. To drop 1V using Ohm’s Law, the needed resistor Rrequired is 1V/0.1A = 10Ω. Select a commercially available 10Ω resistor with an adequate power rating (at least 0.12 × 10 = 1W), so choose a 2W resistor for safety).
Connect this resistor in series with the device. Measure the output with a multimeter to verify it’s close to 4V. Adjust if necessary.
Frequently Asked Questions and Answers
Is using a resistor the most efficient way to reduce voltage?
While resistors can be used for simple voltage drops, they dissipate the excess energy as heat, which might not be efficient, especially for higher currents. For more efficient voltage regulation, consider using voltage regulators or buck converters.
Can I use multiple resistors in series or parallel to achieve the desired voltage drop?
Yes, resistors in series add their resistance values, while parallel combinations have a more complex relationship. The article provides a guide on how to combine resistors to achieve the desired resistance.
Can I use a variable resistor or potentiometer for this application?
While it’s technically possible, using a potentiometer could result in inconsistent voltage drops as it’s adjusted. They are also typically not designed for high-current applications. For precise and consistent results, a fixed resistor is recommended.
Conclusion
Using resistors for voltage adjustment highlights foundational electronics like Ohm’s Law. Despite advanced techniques, resistors offer a cost-effective, practical circuit design solution.


![[4 Methods Explained] How Is Winding Capacitance Measured?](https://www.electronicstalk.org/wp-content/uploads/2023/09/How-Is-Winding-Capacitance-Measured-768x431.webp)