How to Test a Hard Start Capacitor | Quick Test
Set the multimeter to read in the high ohms region, between 10kΩ and 1MΩ, to test the capacitor. Connect the meter leads to the capacitor’s corresponding leads that are red to positive and black to negative. The meter should begin at zero and gradually increase to infinity.

How to Test a Hard Start Capacitor – Steps to Follow
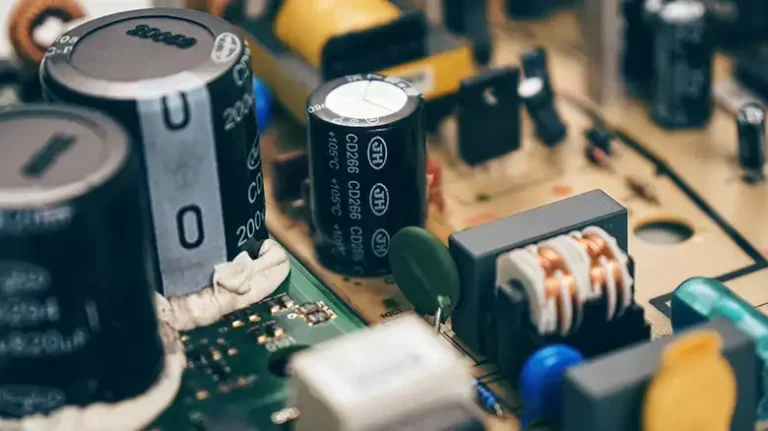
Many household appliances, including washers, refrigerators, and air conditioners, employ start capacitors. Check the capacitor to see whether it is functioning properly if your appliances are buzzing but not starting or operating as they should. You can quickly determine whether your capacitor needs to be replaced by doing a quick test with a multimeter.
How Can You Tell if a Hard Start Capacitor Is Bad?
Firstly, performance issues with your air conditioning system result from signs of a faulty AC capacitor. The external unit’s malfunctioning due to a defective capacitor impedes the cooling procedure as a whole. Furthermore, the system must work harder to complete its task due to poor voltage distribution to outer unit components.
A defective capacitor frequently causes harm to additional components. Finally, the greater power needed to cool your home may result in higher energy expenditures. The cooling system keeps operating, if ineffectively, as a problem arises, and homeowners might not immediately notice.
In some cases, the air conditioner may completely stop working as the primary damaged capacitor indication. These signs of a broken capacitor alert you to a cooling system problem.
Symptoms
You should immediately contact for repairs if you notice a burning smell or smoke coming from the external air conditioning parts, the sound of your air conditioner humming or when you first switch on your air conditioner, it takes some time to begin a cooling cycle.
Also take action if the air conditioning system occasionally shut off, while the air conditioner is running, no cold air is blown into your house and there is no activation of the air conditioning system. If you notice that your energy costs have increased for no apparent reason, it indicates a bad capacitor problem.
How Do You Test a Start Assist Capacitor?
If the capacitor has more than one lead, isolate one of them and short them together to discharge any remaining charge. Install an ohmmeter between the two terminals. Choose high range ohms, kiloohms, or megaohms if a range switch is present.
The resistance should be low at first, rising to many megohms or infinity rather rapidly. For that, an analog meter is great, but digital should also work. There are now multimeters available that can truly measure the μF. The standard ohmmeter test only looks for obvious issues.
How Do You Test a Start Capacitor With a Multimeter?
Here are the steps of testing a start capacitor with a multimeter given below.
Step 1: Locate the Capacitor
In an appliance, capacitors which are basically metal tubes that hold an electric charge are frequently located next to a motor. To open your machine and find the capacitor, use a screwdriver. To remove wires, use needle-nose pliers with an insulated grip. Before you locate the capacitor, make sure your gadget is unplugged and off.
Step 2: Use a Screwdriver
A screwdriver with an insulated handle should be used. Find the screwdriver or get one from a hardware shop. Electricity cannot pass through the metal to your hand because of the rubber.
Verify that there are no breaks in the screwdriver’s handle and that nothing metallic protrudes from the back. This might be electrically charged and damage you severely.
Step 3: Wear a Pair of Gloves
Put on a pair of gloves designed for household chores or handling electricity. Work gloves will be fine as you’re using an insulated screwdriver. Use rubber gloves with a strong grip if you want additional protection from electricity.
Your neighborhood hardware or home improvement store may sell gloves. Avoid using bulky rubber gloves when working because they will reduce your dexterity.
Step 4: Put the Screwdriver’s Shaft on the Positive Terminal
Make sure you have a good hold on the handle and are not touching the metal. Put the screwdriver’s shaft on the positive terminal. Place the screwdriver 1 inch (2.5 cm) from the tip, so that the terminal makes contact with the shaft.
The plus sign (+) is used to indicate the proper terminal. Ensure that the screwdriver doesn’t yet make contact with the capacitor’s other terminal. The positive terminal of a capacitor with more than two terminals could be referred to as “common” instead.
Step 5: Tap the Negative Terminal With the Tip of the Screwdriver
Tilt the screwdriver to make contact with the negative terminal while keeping the positive terminal in touch. Once the connection is made, you’ll hear a brief pop and notice a spark on the screwdriver’s tip. This is simply the capacitor totally discharging, so don’t panic.
Step 6: Remove Residual Charge
Reconnect the terminals to discharge any remaining charge. After the initial spark, continue tapping the negative side of the terminals with the screwdriver’s tip one or two more times. Sometimes the capacitor still has charges in it.
Step 7: Use a Multimeter
Take a multimeter if the capacitor you are checking is completely discharged. Use a digital multimeter’s capacitance setting. Electronic instruments called multimeters can measure the voltage and capacitance of batteries or circuits.
For the most precise results, use a multimeter with a capacitance setting. You may buy digital multimeters at hardware or home improvement stores. Farads are used to measure capacitance.
Step 8: Place the Probes
Put the black probe on the negative terminal and the red probe on the positive terminal. Without contacting the metal pins on the end, hold the probes by their base. The display on your multimeter will begin to alter after both probes make contact with the capacitor’s terminals.
Till the numbers cease fluctuating, keep the probes in place. If the capacitor is functioning properly, the values will fluctuate for a few seconds after you connect the terminals. Before disconnecting the probes, wait five seconds for the readout to display the same number.
Step 9: Compare the Reading
Make that the reading corresponds to the capacitor’s range of values. On the side of the capacitor, along with all of its other details, are listed the minimum and maximum capacitance. Your capacitor’s size will determine the permissible range. The capacitor must be replaced if it is either above or below the range.
The capacitor has shorted out and needs to be changed if the capacitance reading increased indefinitely to the limit of your multimeter. Some capacitors have a fixed capacitance with a tolerable level of fluctuation. For instance, the permissible capacitance range is 47.5 to 52.5 F if your capacitor is marked “50 5%.”
How Do I Test a Hard Start Relay?
There are three terminals on a relay that is characterized as number five, two, and one. From number five to two, there is high resistance coil and from two to one we have a normally closed set of contacts. To test it, take a multimeter and use its ohms function.
To test from five to two, we need to set the multimeter in high resistance. Check if it’s showing the result according. When you’ll move the probes to check two to one, there shouldn’t be any resistance shown in the multimeter display.
Conclusion
Testing a hard start capacitor is no big deal. You can do it well by following some basic rules. All you need is a screwdriver and a multimeter. Just be cautious of the electric shock. Take necessary safety measures like wearing gloves and test the hard start capacitor with a go.

![Can I Replace a 16V Capacitor With an 25V Capacitor? [7 Comparison Aspects Explained]](https://www.electronicstalk.org/wp-content/uploads/2023/07/Can-I-Replace-a-16V-Capacitor-With-a-25V-Capacitor-768x431.webp)
![Will Capacitor Drain My Battery [Unraveling the Facts]](https://www.electronicstalk.org/wp-content/uploads/2023/07/Will-Capacitor-Drain-My-Battery-768x431.webp)
![[Answered] What Is The Shelf Life Of Capacitors?](https://www.electronicstalk.org/wp-content/uploads/2023/12/What-Is-The-Shelf-Life-Of-Capacitors-768x431.webp)