How Does an Oscilloscope Work? A Plain Explanation
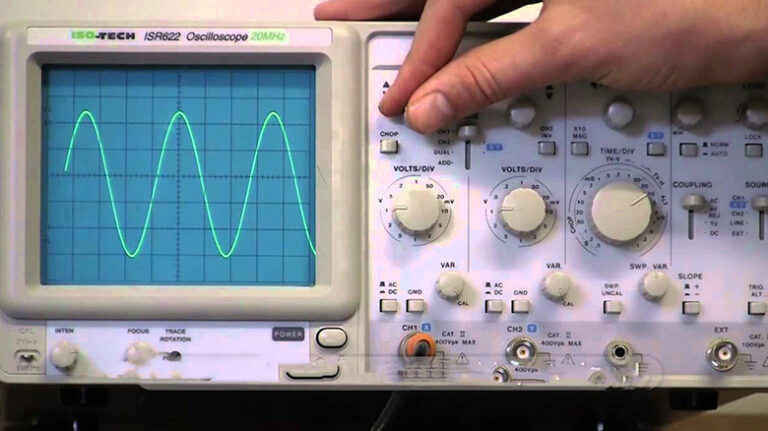
How does an oscilloscope work? It paints a live graph of voltage against time, sliding a dot across a phosphor or LCD grid fast enough that your eye reads the trail as one glowing line. Vertical is amplitude. Horizontal is duration. Feed the probe any electrical signal, and the box redraws its exact shape.

Last updated: August 13, 2026. Tightened the piece, added a spec table, a step-by-step bench routine, and a short FAQ.
My first stable trace was a mess for ten minutes, then a picture-book sinewave. That flip is when the mystery ends. Let me hand you the shortcut I wish someone had handed me on the bench.
How Does an Oscilloscope Work? The Core Idea
Picture a very quick pen. Something drags it rightward at a fixed pace. The incoming potential nudges it up or down at the same instant. Chart both motions together and you get a waveform, a portrait of your signal.
That portrait is the whole point. A multimeter hands you one digit. A scope reveals the geometry behind the digit. Glitches, dips, ringing edges, sag under load, none of it hides from you. In my experience, that geometry tells you at a glance whether a board is healthy or sick. When you learn to read shapes, you stop guessing.
The screen is a grid. Usually 10 divisions across and 8 tall. You choose what each square means. One division wide might equal 1 microsecond. One division upward might equal 1 volt. Turn either knob, and the same waveform looks tall and slow, or short and quick. Nothing about the signal shifted. Only your ruler did. I’d recommend memorizing this rule on day one.
The Trigger Is the Real Trick
Here is the piece rookies skip, and it matters most. Without a trigger, the trace redraws at random moments and the picture drifts like a ghost. The trigger tells the box, “begin sketching right here, every sweep.” It waits for the input to cross a threshold you pick, then it opens the horizontal ramp from that instant. The Tektronix primer describes the trigger as the knob that “stabilizes a repeating waveform” so it appears to freeze. Nail it and the picture locks. Miss it and nothing settles. When you learn triggering first, everything else falls into place.
Analog vs Digital: What Changed?
Both flavors answer the same question, but they arrive by different roads.
An analog model behaves like an old CRT set. Your probe carries the potential into the vertical amplifier, which steers an electron beam. A ramp circuit tows that beam left to right at a fixed pace. The beam strikes phosphor on the glass, and phosphor glows briefly where struck. Because the glow fades within milliseconds, the beam has to keep sweeping, and your eye stitches those flashes into one steady curve. CRT scopes owned every lab bench for roughly sixty years.
A digital unit samples first, then paints. An analog-to-digital converter reads the input a few million times a second and stores each reading as a number. Those numbers drop into memory. A quality bench scope now holds 8 GB of samples on a busy capture. The processor rebuilds the trace on an LCD from that recorded stream. Because everything sits in RAM, you can freeze, zoom, measure, and export. Storage is why digital took the crown.
| Feature | Analog scope | Digital scope |
|---|---|---|
| Display | Phosphor, live beam | LCD from samples |
| Signal path | Direct, continuous | Sampled by an ADC |
| Freeze and zoom | No, the trace fades | Yes, held in memory |
| Auto measurements | Manual, off the grid | Built in, one button |
| Save to file | No | Yes, USB or LAN |
| Entry price today | Used only now | $150 to $400 new |
If you want deeper theory on the sampling side, the analog-to-digital converter does the heavy lifting, and its own literature is worth a separate hour.
How Do You Read the Screen?
Read it as a graph. Time runs left to right. Voltage climbs from the bottom. Once that lands, everything else is arithmetic.
Count the divisions. Say one cycle spans 4 boxes across, with each box set to 1 microsecond. That gives a 4 microsecond period, which works out to 250 kHz. The same trick yields amplitude. If the wave reaches 3 boxes tall at 0.5 volts per box, you are looking at 1.5 volts peak to peak. That counting method is exactly how you end up reading frequency straight off the screen without extra gear.
Most benches ship with two or four input channels, so you can overlay signals and compare their timing. Gold for hunting a delay between input and output. When you battle a noisy sensor line, my notes on taming a jittery 4-20mA loop pair well here. If a fast edge looks softer than you’d expect, the gap between filter shapes explains why.
How to Set Up an Oscilloscope
Here is the routine I run at every fresh bench. Skip a step, and you’ll chase a fault that is not there. Don’t cheat the order.
- Power the unit on. Plug a probe into channel one. Press the channel button so its trace switches on.
- Set probe attenuation, usually 1x or 10x, and tell the scope which you picked. A 10x tip that thinks it is 1x reads ten times low.
- Clip the ground alligator to a solid chassis ground on your board. Touch the probe tip to the test point. Ground first, always.
- Turn the horizontal knob until one or two full cycles fill the screen.
- Turn the vertical knob so the wave stands tall but does not clip against either rail.
- Nudge the trigger level to the middle of the waveform. The picture locks and stops sliding.
- Hit Measure for automatic readouts, like peak-to-peak and frequency.
- Press Single when hunting a one-off event, a single sweep rather than a rolling live view.
A few habits pay for themselves every week:
- Start with a slower time base than you think you need, then speed up. A signal that is too sluggish is easier to spot than one flashing past.
- Keep the ground lead short. A long loop pastes ringing onto the trace that lives nowhere in your circuit.
- Don’t trust a flat line. Wiggle the probe. Dead traces often mean a broken clip, not a dead signal.
- Auto-set works fine as an opener, but I retune the trigger by hand almost every time.
How Does It Measure Voltage?
The scope measures potential the way a fast voltmeter would, then it plots that number instead of printing it. A digital rig samples the input, converts each sample into a digit, and stacks those digits on the vertical axis against time. So you are not receiving one voltage. You are receiving one for every slice of time, millions of them, redrawn at 1 GS/s on a quick bench instrument. A decent scope holds accuracy within 2 percent of the true value.
Frequently Asked Questions
So how does an oscilloscope work in one sentence?
It plots the input’s voltage on the vertical axis against time on the horizontal axis, so you see the exact shape of the waveform instead of a single meter reading.
What separates a scope from a multimeter?
A multimeter reports one number, like 5 volts. An oscilloscope reveals how that potential behaves over time, catching spikes, noise, and timing quirks a handheld meter cannot.
Should I buy an analog or digital model?
Buy digital. Digital units let you freeze, zoom, and save a capture, and a solid entry rig costs $150 to $400. Analog benches are worth owning only as vintage curiosities today.
What does the trigger do?
The trigger tells the box when to begin each sweep. It waits for the input to cross a chosen threshold, then draws from that point, which holds a repeating waveform still on the screen.
Can a scope damage my circuit?
Not on its own. The classic mistake is a sloppy ground path, so clip the alligator to chassis before touching the tip to any live node.
How fast can it sample a signal?
Entry rigs sample several million times a second. Lab flagships push into gigasamples per second. The rule of thumb: pick a bandwidth several times faster than the quickest edge you plan to observe.
Bottom Line
So how does an oscilloscope work? It converts a voltage into a picture, plotting that potential against time so the true shape of your signal appears on a grid you can measure. Analog rigs paint the trail with a live electron beam. Digital units sample the input and rebuild it from memory. Master the trigger and the two knobs, and the box stops being a mystery. For extra depth, the oscilloscope overview on Wikipedia is worth another read.