How Long Does It Take for a Microwave Capacitor to Discharge?
The microwave, despite its diminutive size and simplicity, is a deadly appliance. While microwaves might be hazardous, you should be aware that they need a lot of electricity to operate. The fact that your appliance also features a high voltage microwave capacitor is something that most people are unaware of.
If the internal resistor is 10 megohms and the capacitor is less than 1 microfarad, it will take several tens of seconds to discharge to a safe voltage. If you leave your microwave on for the entire night, the capacitor ought to be dead.
How Long Does It Take for a Microwave Capacitor to Discharge – Guidelines to Follow
The main responsibility of the microwave capacitor is to make sure your food is heated up when the appliance is on. Even after you unplug the appliance, this component retains remarkable amounts of electricity.
Even when the microwave is disconnected, you run the risk of electrocution if you mess with it. In fact, this component is so potent that you may still experience a decent shock, days after unplugging the microwave, demonstrating the need for great care. In actuality, this is the major safety risk when preparing food in your microwave.
How Long Does It Take for a Capacitor to Dissipate?
Theoretically, a capacitor can never fully discharge or charge, but in practice, they do. After one time period, a fully charged capacitor loses 63 percent of its voltage. A capacitor loses nearly all of its stored voltage after five cycles or nearly 0%. In light of this, it is acceptable to assume that a capacitor dissipates in 5-time constants.
As mentioned, the capacitor will be around 63 percent emptied, that is there will be about 37 percent left when the discharge begins, which lasts for the first 4.7 seconds (one time constant/tau). It will have 95 percent of its energy left in 14.1 seconds. The leftover voltage, or the remaining 5 percent, is often insignificant unless the voltage was quite high.
How Do You Discharge a Microwave Capacitor?
If your microwave stops heating or any other issue occurs, the reason can often be the high voltage capacitor inside it. This task comes with serious hazards. Thus it’s important to know the proper guide for discharging a capacitor before diving into the solution.
Things You Need
You will need a few materials and equipment for this simple fix. Remember that these materials are only appropriate for eliminating dangers. You will still need to locate the defective component and buy it separately.
You may want a torque screwdriver, rubber-handled needle-nose pliers, safety-protective rubber work gloves, and rubber work boots. Once you have them all, you may start working.
Required Steps
Here are the steps you need to carefully go through. However, these are generalized instructions. Follow along while consulting the user’s handbook for disassembly if your microwave is different.
Step 1: Unplug the Microwave
Verify that your microwave has no external power source and is not plugged into the wall.
Step 2: Remove the Plate and Glide Roller
Remove the gliding roller and spinning disc first. As you disassemble the microwave, these will only ratchet and perhaps break.
Step 3: Remove the Top Grill Behind the Door
There will be screws along the length of the top of your microwave if there is a top grill there. After removing these screws, open the microwave door. To remove the grill, slide it to the left and lift. When the microwave door is closed, this will leave an open slit behind the door. Lock the door to the microwave.
Step 4: Remove the Bottom Panel
The bottom panel can be removed by closing the microwave door and turning the appliance on its back. All of the bottom pane’s mounting screws should be removed. The bottom panel can then be set aside and out of the way.
Step 5: Unwrap the Microwave Case From the Body
The majority of the screws holding the microwave’s outside cabinet or casing in place must now be removed. You should be able to lift and pull the case away once it starts to feel loose. Avoid catching anything, including the cord or any leftover microwave body parts.
You should put on your work gloves right now. Because you’ve just revealed the interior of the electric panel’s power supply as well as because the panel’s interior can be sharp.
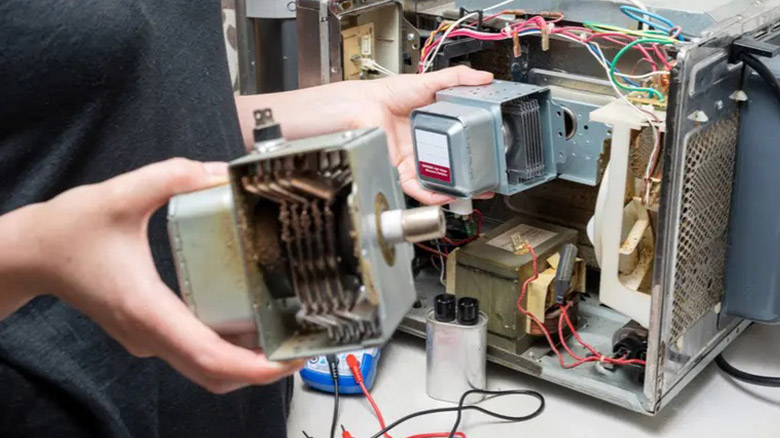
Find the Terminals and Capacitor
For every microwave, the capacitor is not always in the same spot. Find it by consulting the manual for your microwave’s brand and model, or seek for the component that obviously has two terminals. A red wire and a white wire will be attached to it, and they will be joined by two screw bolts to an extended metal container inside a metal casing.
If you’re unsure, consult your manual to find the capacitor precisely. Remember, don’t just start looking around; this is risky. We’ll try to walk you through the different capacitor models using a simple explanation of how capacitors are created.
Discharge the Capacitor
After disassembling the microwave, you have to proceed with the capacitor.
Step 1: Select Your Tool
Choose the tool you will use to discharge your capacitor after taking a look at it. If the terminal screws are visible, all you need to do is run a flat-tipped, well-insulated screwdriver simultaneously along both of them. A spark could arise from this. Alternatively, you will want the needle-nose pliers if the terminal screws are concealed beneath plastic tubing.
Step 2: Ensure Safety
Wear work gloves made of rubber or rubberized materials. Once the microwave case has been removed, you must do this immediately to ensure that you won’t get electrocuted.
Step 3: Touch Both Terminals With the Same Metal Tool
If you decide to use a screwdriver, place the tip or body of the tool such that the metal joins the two terminals. Use needle-nose pliers to carefully separate the nose of the pier, then insert one-half of the nose into each terminal. Make sure both terminals are touched to allow electricity to pass between them via a middle metal object.
Step 4: Wait 2-5 Seconds
Allow up to five seconds before taking out your tool. You might have noticed a large flash or a minor fizzle. In either case, you have just prevented the possibility of receiving a very unpleasant shock.
Will Capacitors Discharge Over Time?
The current flowing through the capacitor drops as the capacitor’s terminal voltage rises over time to match the applied voltage from the source. When the capacitor reaches the source’s maximum voltage, it will no longer draw current from it and begin to operate more or less like an open circuit.
A charged capacitor will discharge itself whenever the circuit in which it is incorporated allows current to travel between its two plates. A stretched rubber band would serve as an illustration. When freed from whatever is keeping it stretched, it will immediately return to its relaxed state.
Therefore, a capacitor should theoretically gradually lose its charge. An ideal fully charged capacitor discharges to 63 percent of its voltage after one time constant when it is removed. Thus, after 5-time constants, this capacitor will deplete up to almost 0%.
How do you make sure a capacitor is discharged?
To ensure the capacitor is fully discharged, you touch the tip of one capacitor to the one across from it and drag the screwdriver slowly in that direction. This results in a short circuit and the discharge of electricity. This may need to be repeated several times.
Conclusion
The steps you require to follow to discharge a capacitor will help you avoid receiving any unpleasant shocks when working near the microwave. If you are not confident enough to pull this off or if you don’t know how to protect yourself from electro conduction, it’s suggested to seek help from someone professional.