How to Reduce 5V to 4V Using Resistor: Quick Guide
If you are wondering how to reduce 5V to 4V using resistor hardware, the short answer is one component wired in series with your load. Ohm’s Law sets the value. Divide the 1V you want to shed by the milliamps your device draws, and that number is your target ohms. Cheap. Tiny. For a steady draw, it works. The catch: your 4V only holds if the amperage stays put.
Last updated: August 13, 2026. Rewrote the procedure, added a lookup table, a worked example, and a proper FAQ block.
When a Plain Series Part Is the Right Tool
A resistor is not a regulator. It cannot hold 4V steady if your load’s appetite swings around. So reach for one only when the demand is fixed and known. A sensor. A tiny logic chip pulling a locked few milliamps. An LED biased to a set brightness. Those fit fine. For a motor, or anything that gulps power in bursts, skip the trick. Grab an LDO instead. I learned that painful lesson years back, on a prototype that kept browning out mid-demo.
Two rules I lean on:
- Fixed, small, predictable draw, a series part is perfect.
- Amperage that jumps around, use a low-dropout regulator.
Need the same math at a wider ratio? The approach mirrors converting a 24V rail down to 5V, just with a bigger delta to burn as heat.
How to Reduce 5V to 4V Using Resistor: Step by Step
Here’s the exact recipe I follow at the bench. Five minutes flat.
- Measure the load draw. Feed your device 4V from a bench supply and read what it pulls. Call that number I_load. Say it lands at 100 mA.
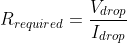
- Run the Ohm’s Law math. You want to shed 1V, which is 5V minus 4V. Ohms equals volts over amps. So R = 1V / 0.1A = 10Ω. Straight from Ohm’s Law.
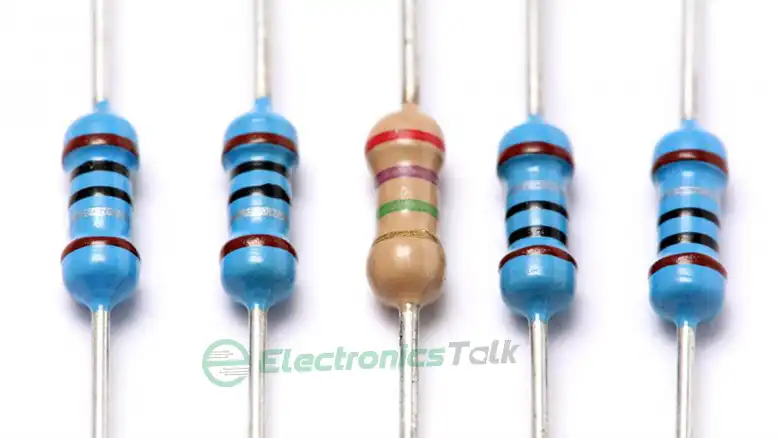
- Pick a stock value. Round to the closest common part. A 10Ω unit sits on every distributor shelf. Now mind the tolerance. A ±5% part can wander. A ±1% piece holds tighter. Whether a 10k can stand in for a 1k is a separate puzzle, but the tolerance thinking is identical.
- Check the wattage rating. Your component turns that spare volt into heat. Wattage equals amps times the 1V drop, so 0.1A × 1V = 0.1W here. Buy one rated at least twice that figure. Series parts run warm under load, and hot parts drift off value.
- Wire it inline. Slip the resistor between the 5V rail and the load, straight through, never shunted across. The same amperage then flows through both, which forces the drop per Kirchhoff’s Voltage Law.
- Meter again. Put probes across the load. You should see close to 4V. If tolerance pushed the reading off, swap in the next standard value up or down.
Worked Example: One Series Part for a 100 mA Load
Say your gadget wants 4V and pulls 100 mA. You need to burn off 1V. Ohm’s Law says R = 1V / 0.1A = 10Ω. The component eats 0.1W, so a 0.25W or 0.5W piece is plenty, well past the 2x margin I like to keep. Wire the 10Ω unit in series, meter the load, and you’ll land within 2% of 4V. Done.
Here are common cases so you can eyeball your own build:
| Load current | Series resistor (1V drop) | Watts burned |
|---|---|---|
| 50 mA | 20 Ω | 0.05 W |
| 100 mA | 10 Ω | 0.1 W |
| 200 mA | 5 Ω | 0.2 W |
| 500 mA | 2 Ω | 0.5 W |
Yes, you can reduce 5V to 4V using resistor math for any of those rows. Just recompute if your draw doesn’t match.
Why the Amperage Has to Stay Constant
Here comes the trap. The part sheds 1V only at the amperage you designed for. Pull more, the loss grows and your 4V sags. Pull less, the loss shrinks and the rail creeps back toward 5V. Most “why is my rail wrong” tickets I’ve seen trace back to a load whose consumption shifted when nobody expected it. If your gadget changes how much power it draws, plain ohms are the wrong answer. No amount of tweaking fixes that.
Watch the Heat and Watch the Tolerance
Two things bite folks. First: heat. That wasted volt becomes Joule heating inside the body, and a component running near its ceiling ages fast and drifts. Give it breathing room. Second: tolerance. A ±5% part marked 10Ω actually sits somewhere between 9.5Ω and 10.5Ω, which shifts your output by roughly 10% of the delta. For anything fussy, spend on ±1%. My mantra with beginners: “meter it under load, not open circuit.” An open-loop reading lies every time.
Quick bench habit I always share: probe the ground clip first, then touch the tip to the load. That way you catch a bad clip before you blame the design. Little things.
Frequently Missed Details on the Wire-Up
A few last notes worth flagging before you solder:
- Keep the leg short. Long wire adds its own resistance, and on a 10Ω target that matters more than you’d think.
- Use flush cutters. Ugly leg lengths mean bad contact under vibration.
- On breadboards, prefer the outer power rails. Center strips can go flaky at higher draw.
- Label the part with a Sharpie. Future-you will thank present-you.
Frequently Asked Questions
Is a resistor the best way to reduce 5V to 4V?
For a small, steady load, yes. Cheap and simple. If the draw swings, or efficiency matters, an LDO wastes less and holds the rail far better.
What ohms value drops 5V to 4V?
That depends on your load. Divide 1V by the amperage. A 100 mA device needs 10Ω. A 50 mA device wants 20Ω. There’s no single magic number.
Does a voltage divider work instead of one series resistor?
A two-part divider can set 4V, but it only stays honest under a fixed draw and wastes extra amps through the lower leg. For one known device, a single series piece is simpler and loses less power.
How much wattage does the resistor dissipate?
Wattage equals the load amperage times the 1V loss. At 100 mA that’s 0.1W. Pick a piece rated at least twice higher so it runs cool and stable.
Will the part get hot?
A little warmth is fine and normal. If it burns your finger, your wattage rating is too small. Parts pushed near their ceiling drift and can lose their voltage headroom, so size upward.
Can I use a potentiometer to fine-tune the 4V?
You can for a quick bench sanity check, but a pot drifts as it gets knocked and isn’t built for sustained draw. Once you know the number, solder in a fixed piece and forget it.
Does temperature swing change the ohms value?
Yes, though usually just a smidge. Carbon-film parts wander a couple percent across a wide range. Metal-film pieces hold much tighter. If your project runs in a hot enclosure, buy metal-film or precision types.
Bottom Line
To reduce 5V to 4V using resistor hardware, size one series component with Ohm’s Law, confirm its wattage headroom, then verify the 4V under a real load. Clean, cheap fix for a steady, low-draw device. If your amperage moves around, or efficiency matters, grab a regulator. Honest tradeoff, no shortcuts.